Shuttle Tatting Without A Teacher (13)

and chain you have just tatted) when the front side of the ring is facing up, the chain starts with half a DS then fol-lows with complete DS then ends with a half. To remedy this, and form complete sets of DS on the front side, the chain has to be started with the second half of a DS -don't forget that after the ring, you have reversed your work and are now tatting on the back side.
Complete as many DS as directed (first half then second half) - MINUS one DS - then fin-ish with the first half of a DS. The two single halves make up for the ‘minus one DS’.
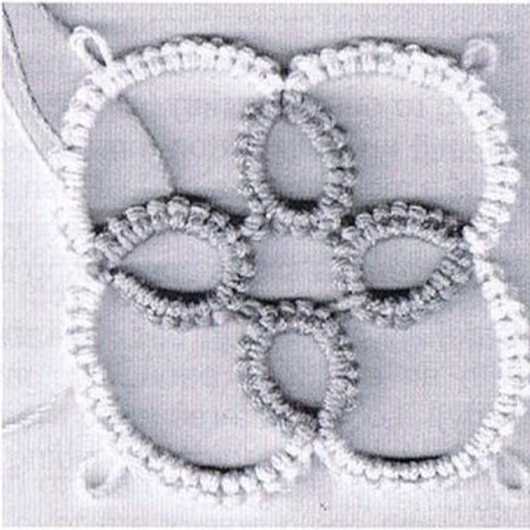
Keeping all the above in mind, tat the motif as follows:
|
S1 |
8-4-8 |
RW |
|
S2 |
10 -10 |
u |
|
S1 |
8 D+ 4 -8 |
n |
|
S2 |
repeat C 1 |
u |
|
S1 |
“ R 2 |
u |
|
S2 |
“ C 1 |
u |
|
S1 |
8 D+ 4 |
ROUND 1: RING 1: CHAIN 1: RING 2: CHAIN 2: RING 3: CHAIN 3: RING 4:
STOP THERE AND REFER TO NEXT PARAGRAPH
AFTER joining (D+)finish ring with 8 RW
CHAIN 4: repeat CH I (see * next page)
JOINING LAST RING OF MOTIF TO FIRST RING WITH-OUT TWISTING THE PICOT!
(This particular method is for right side/wrong side tatting).
Hołd first ring so that the joining picot is at the 12 o’clock position. Fold it forward and down so that the back of the ring is facing up and has the joining picot sticking out to the right at 3 o’clock. Position the ring thread under the picot, insert hook into picot FROM THE BACK. Reach up to the ring thread with the hook (this causes the picot to twist). Catch the ring thread with the hook and puli it through the picot to form a loop. Insert second finger of left hand into the loop to keep it open. Remove the hook. Pass the shuttle through the loop from left to right. Puli loop into position and complete the DS and ring and finish as directed in the pattern.
JOINING AT THE END OF A ROUND!
The method of ending the rounds of the motif we are cur-rently tatting doesn’t cali for hiding the ends, but if it had, the following would be the way to do it:

While working the last chain of a round, stop before tatting the finał six DS. Through the next two DS, as when hiding thread-ends at the beginning, work a piece of fine but strong thread -doubled - along with the ring thread (as shown in illus. C, p.
19).
Then work in another piece of doubled thread - along with the first piece - through the last four DS (illus. D, p. 19). (As you are working them, don’t puli these last six DS as tight as you would normally.) This puts the two loops right at the end of the chain. Cut the chain threads, leaving approx. 3”. Catch these two ends with a hook and puli them through the space at the base of the first ring and chain. Thread each end into each of the loops, puli on each loop separately bringing the tales through (leave tales until blocked).
Ed.’s notę: The described method works well with fine silk threads. It might be helpful to know that usually only one looper is carried per chain or ring.
23
Wyszukiwarka
Podobne podstrony:
Shuttle Tatting Without A Teacher (10) I urge you to try both ways. I have great faith that you will
Shuttle Tatting Without A Teacher (6) the loop which was formed over the fingers of your right hand.
Shuttle Tatting Without A Teacher (9) the ‘loop’ loose enough to raise the middle finger and also le
Shuttle Tatting Without A Teacher (9) the ‘loop’ loose enough to raise the middle finger and also le
Shuttle Tatting Without A Teacher (10) I urge you to try both ways. I have great faith that you will
Shuttle Tatting Without A Teacher (14) WE have discussed and demonstrated what is consid-ered to be
Shuttle Tatting Without A Teacher (7) Once the whole shuttle is beyond the top thread, bri
Shuttle Tatting Without A Teacher (8) to make light colored stitches (sińce the loop around the left
Shuttle Tatting Without A Teacher (11) The smali motif on which we will be working is for practice p
więcej podobnych podstron