Shuttle Tatting Without A Teacher (5)

Figurę 2a shows the circle of thread around the fingers when the hand faces you. Check to see that the circle is complete, then turn left hand back to face the right.
Hołd the knot once again (also the thread now lying next to it) between thumb and first finger. You will see that the loop around the left hand is formed with the dark thread.
Fig. 2a
Raise the middle finger of your left hand (lifting the loop with it) and adjusting the size of the loop so that you will have a space of about two inches on the loop between your first finger and middle finger. This is the working space where all the stitches will be madę. This position may feel extremely uncomfortable for a while - don’t de-spair, you’ll get used to it!

Holding the shuttle in your right hand, as previously illus-trated, with the thread hanging down behind it, turn that hand so that the palm is facing upwards with your fingers straight out. The thread coming from the shuttle will now be lying across the fingers (palm-side). Twist this hand to its former position at the same time looping the thread around the fingers of the same hand so that the thread is now lying over the top of the fingers of the right hand. This is forming a loop which is used when making the first half of the double stitch.
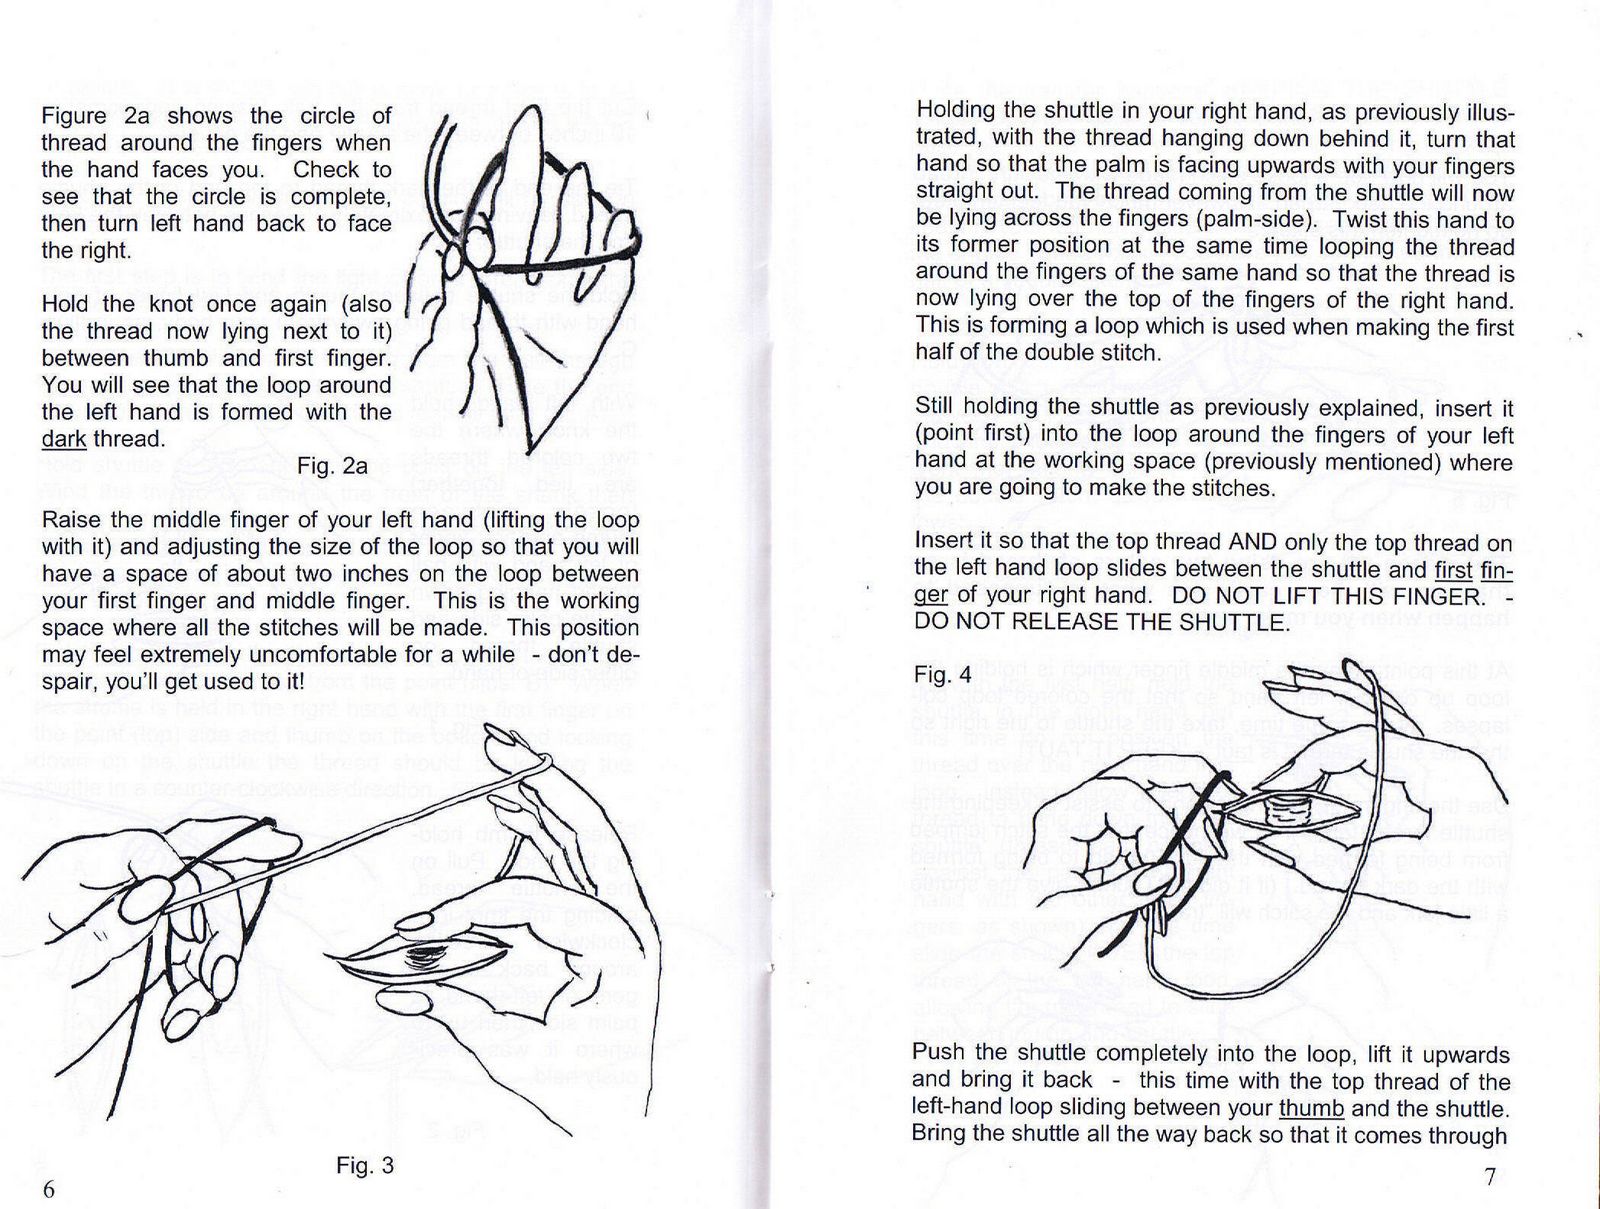
Still holding the shuttle as previously explained, insert it (point first) into the loop around the fingers of your left hand at the working space (previously mentioned) where you are going to make the stitches.
Insert it so that the top thread AND only the top thread on the left hand loop slides between the shuttle and first firn ger of your right hand. DO NOT LIFT THIS FINGER. -DO NOT RELEASE THE SHUTTLE.
Fig. 4

Push the shuttle completely into the loop, lift it upwards and bring it back - this time with the top thread of the left-hand loop sliding between your thumb and the shuttle. Bring the shuttle all the way back so that it comes through
7
Wyszukiwarka
Podobne podstrony:
Shuttle Tatting Without A Teacher (8) to make light colored stitches (sińce the loop around the left
Shuttle Tatting Without A Teacher (11) The smali motif on which we will be working is for practice p
Shuttle Tatting Without A Teacher (12) bali end) through the smali loop. Puli on the short end comin
Shuttle Tatting Without A Teacher (6) the loop which was formed over the fingers of your right hand.
Shuttle Tatting Without A Teacher (9) the ‘loop’ loose enough to raise the middle finger and also le
Shuttle Tatting Without A Teacher (9) the ‘loop’ loose enough to raise the middle finger and also le
Shuttle Tatting Without A Teacher (13) and chain you have just tatted) when the front side of the ri
więcej podobnych podstron