Shuttle Tatting Without A Teacher (12)

bali end) through the smali loop. Puli on the short end coming from the ring to tighten up the smali loop.
RW and tat the Chain (10-10), slipping the short end of shuttle 2 through four DS in the same manner as through the ring stitches. Complete chain as directed. Now we have two short ends just hanging. I know they make the lace look messy. BUT it is most important that these short ends stay put until the whole piece is finished and blocked. Once the finished lace is blocked and dry, puli each short end gently and clip close to the tatting. CARE must be taken to NOT cut ANY of the thread in the tatting, only the ends.
An alternative method: instead of passing thread of shuttle 2 through the smali loop after the ring has been closed, would be to enclose shuttle 2 thread within the loop prior to starting the ring, as follows:
Form loop around hand with thread of shuttle 1 (illus. A). The large X is the position of the thumb. Lay the end of the thread from shuttle 2 over the joining place (illus. B) and hołd with thumb. Start to tat the ring with the first half of a DS, as usual.
Transfer the stitch (see illus. B - first method) but before tightening it up, lift thumb, being careful not to allow shuttle 2 to puli out, slip the short end of shuttle 1 over shuttle 2 thread then through the transferred stitch (illus. C). Work the second half of the DS then puli on short end to close up smali loop which enclosed thread from shuttle 2. Work another three DS each time slipping short end through, then complete ring (8-4-8) WITHOUT slipping short end through. Close ring.
RW and tat the chain (10-10), slipping the short end of shuttle 2 through the four DS in the same manner as through ring stitches. Complete chain. As before leave the short ends hanging.
Read the next paragraph - it should be easy to under-stand without actually working the steps - then continue with the motif. The complete directions and illustrations
for the motif are on the next page. KNOTLESS JOININGS
It is always easiest to ‘join’ broken or cut threads at the beginning of a ring sińce one end can be ‘carried’ or hid-den in the ring and the other in the chain.
If you have closed your ring then discover a mistake -oops - an unintentional design variation - don’t waste time trying to open the ring (with silk thread it might not be too difficult but with cotton threads - especiaily the finer ones - it's almost impossible). Push aside the DS - as much as you can - between the beginning and end of the ring -this reveals a single connecting thread.
Carefully cut this thread, puli the shuttle and you’re left with an end long enough to make a join (albeit rather curly)! Loop this thread and the shuttle thread and join as you did at the beginning, hiding one end in the ring and the other in the chain.
(There are many sources which currently refer to these meth-ods of burying ends as T.O.T.)
FRONT/BACK SIDE TATTING
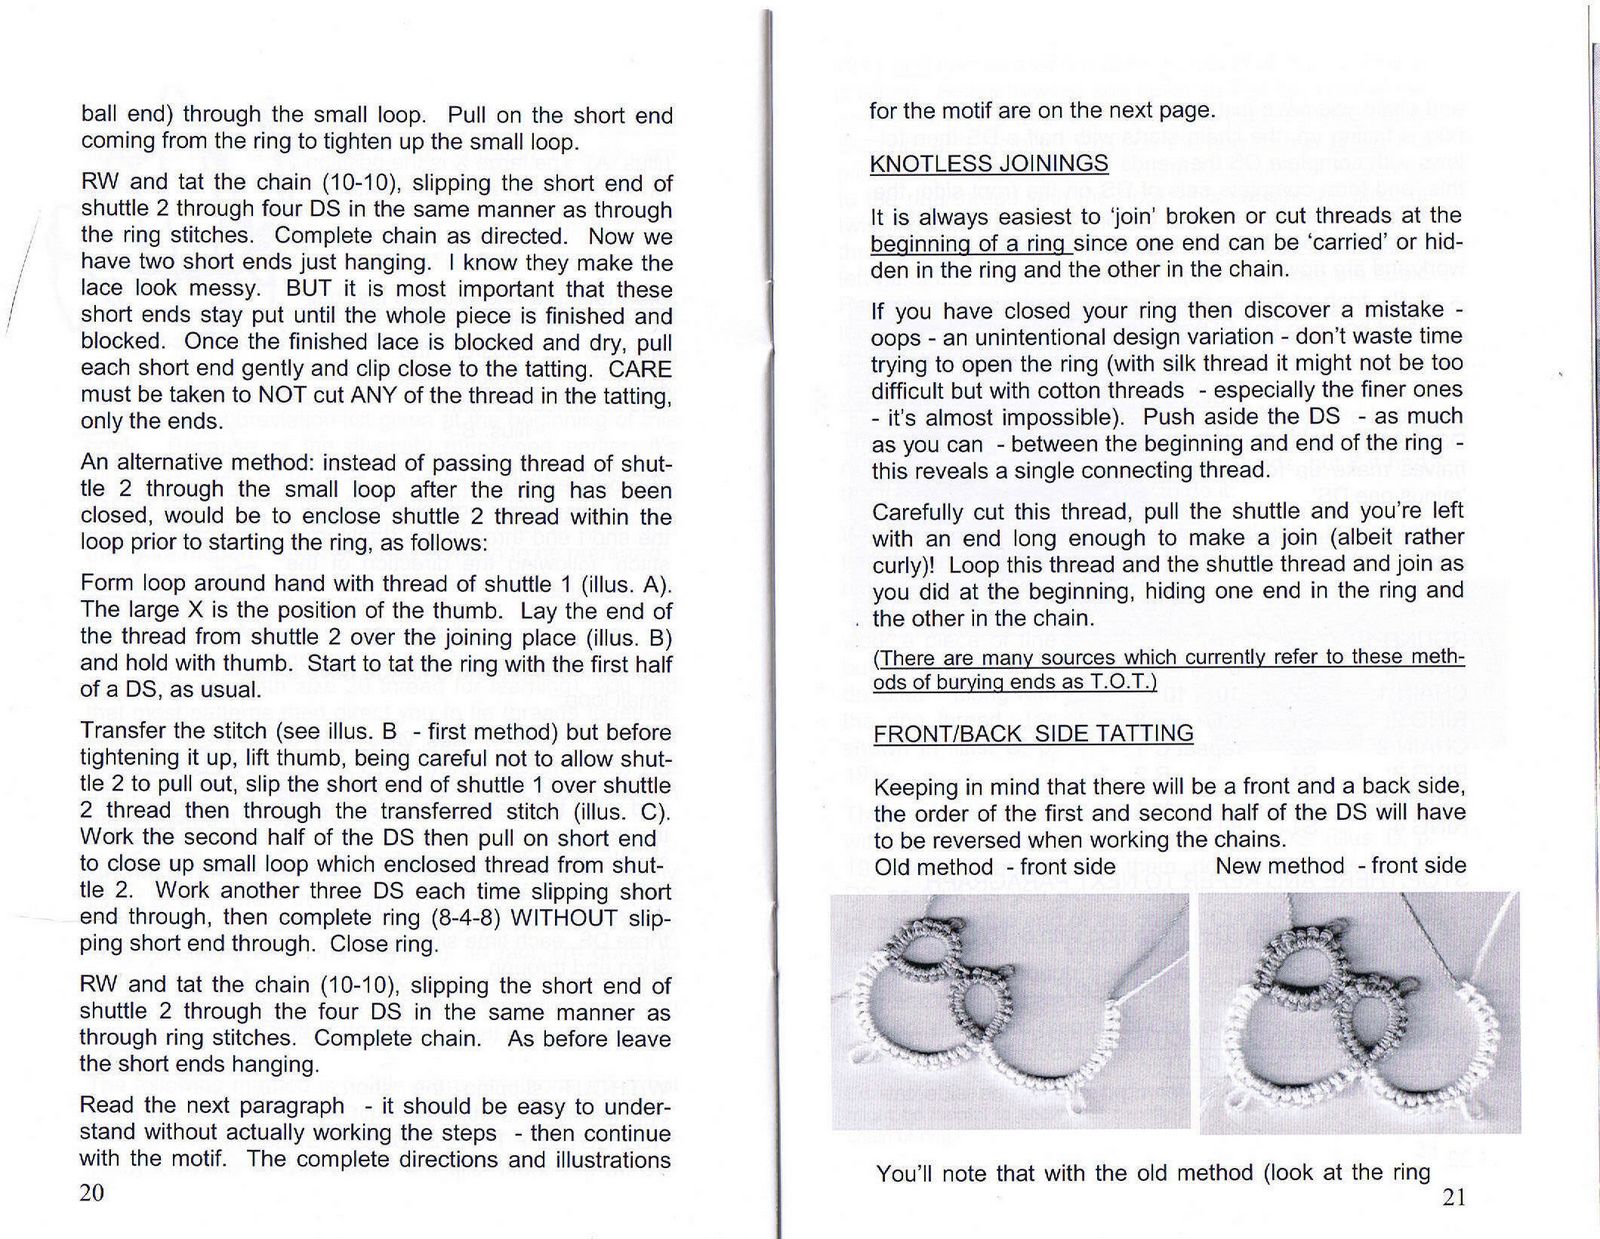
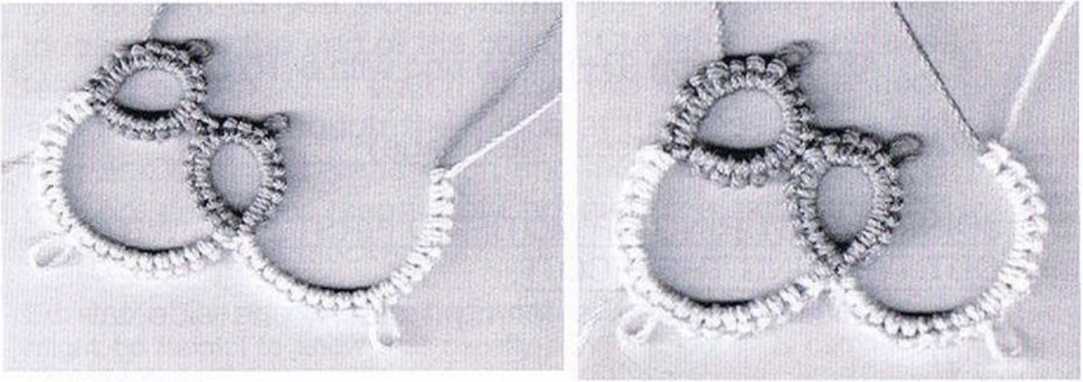
Keeping in mind that there will be a front and a back side, the order of the first and second half of the DS will have to be reversed when working the chains.
Old method - front side New method - front side

You’ll notę that with the old method (look at the ring
21
Wyszukiwarka
Podobne podstrony:
Shuttle Tatting Without A Teacher (8) to make light colored stitches (sińce the loop around the left
Shuttle Tatting Without A Teacher (10) I urge you to try both ways. I have great faith that you will
Shuttle Tatting Without A Teacher (11) The smali motif on which we will be working is for practice p
Shuttle Tatting Without A Teacher (1) Croęhcr Jjfr Ouilting & £ ustom druimc . 44a*V , 4(nynaul
Shuttle Tatting Without A Teacher (1) • //sny A/ayruttt/ 315 S 6lh St HtincsTuc, ‘Wt^ou/i <p 820
Shuttle Tatting Without A Teacher (4) or points. If a shuttle without a hook or point is to be used,
Shuttle Tatting Without A Teacher (6) the loop which was formed over the fingers of your right hand.
więcej podobnych podstron